1. Start Rhino, using the Large Objects – Feet template.
2. Double-click on the Perspective viewport label to maximize the viewport.
3. Type OSNAP and make sure only Endpoint and Intersection snaps are “On.”
4. Type LAYER to bring up the Layers palette. Double-click on Layer 01 to rename it Floor. Click in the check-mark column to make the Floor layer current.
5. Type BOX. For the First corner of base, type 0,0 (zero comma zero) [enter].
6. For the Other corner of base, type @14’,22’ (at fourteen feet comma twenty-two feet) [enter].
7. For Height, type 1’ (one foot) [enter].

8. In the Layers palette, double-click on Layer 02 to rename it Walls. Click in the check-mark column to make the Walls layer current.
9. Type BOX. For the First corner of base, click on the near corner of the floor. This point represents the outside corner of the bottom of the first wall. (END and INT will highlight to let you know you are snapping to the endpoint/intersection at the corner of the existing box.)
10. For the Other corner of base, type @-6”,22’ (at negative six inches comma twenty-two feet) [enter].
11. For Height, type 8’ (eight feet) [enter].
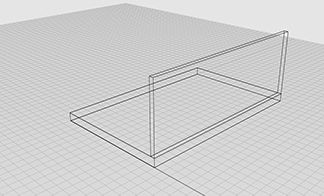
12. Type COPY. Select the wall you just built. For Point to copy from, choose the inside corner of the base of the wall you just built. For Point to copy to, choose the outside corner of the opposite side of the floor.
13. Type COPY. Select the original wall again. For Point to copy from, choose 0,0. For Point to copy to, choose 0,0. (This is known as copying in place.)
14. Type ROTATE. Select the original wall. Rhino will prompt you to select one of two walls in the same place; choose either one.
15. For the Center of rotation, click on the outside corner of the base of the wall.
16. For the Angle or first reference point, type 90.
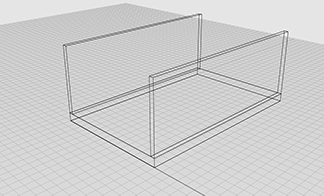
17. Type MOVE. Select the copied wall. Move the wall so its corner aligns properly with the first wall you built. (OK if walls overlap.)
18. Type SCALE1D. Select the copied wall. For the Origin point, click on the near corner of the base of the wall. For the Scale factor or first reference point, click on the far corner (same side) of the base of the wall. For the Second reference point, click on the inside corner of the second wall you built. (Again, OK if walls overlap.)

19. Use the COPY command to copy the new wall to the opposite side of the floor.

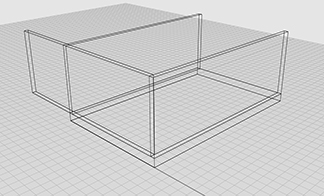
20. Type BOOLEANUNION. Select the four walls you just built and press [enter].
21. Type SETDISPLAYMODE. Set the display mode to Rendered.

22. Type OSNAP and check the Nearest snap “On.” (This will allow Rhino to lock to lines and edges.)
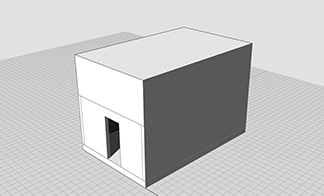
23. Type BOX. For the First corner of base, click on an inside edge of the short wall already built. (This point will correspond to the corner of the front door.) For Other corner of base, type @3’,-6” (at three feet comma negative six inches). For Height, type 6’8” (six feet eight inches).
24. Type BOOLEANDIFFERENCE. Select the walls [enter], then the door [enter].

25. In the Layers palette, double-click on Layer 03 to rename it Roof. Click in the check-mark column to make the Walls layer current.
26. Type BOX. For the First corner of base, click on the near outside corner of the top of the walls. For the Other corner, click on the far outside corner of the walls. For the Height, type 6’ (six feet).
27. Type CPLANE. Invoke the 3Point option either by clicking on 3Point in the Command line, or by typing I [enter]. Click any three non-colinear points on the front surface of the “roof box” you just drew. (This changes the orientation of the base grid.)

28. Type OSNAP and check the Midpoint snap “On.”
29. Type POLYLINE and draw a triangle on the front face of the “roof box” corresponding to the roof gable. Make sure to “close” the polyline by clicking on the first point to complete the triangle (a total of four clicks).
30. Click on the “roof box” and press [delete].

31. Type EXTRUDECRV. Select the triangle you just drew. Click on the back of the house to “extrude” the triangle into a gable.
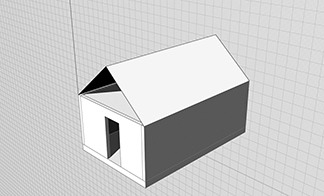
32. Type CAP. Select the extruded triangle.

33. Type CPLANE. Invoke the World option [w] and the Top plane [t].

