1. Start Revit. Under Projects, select Architectural Template.
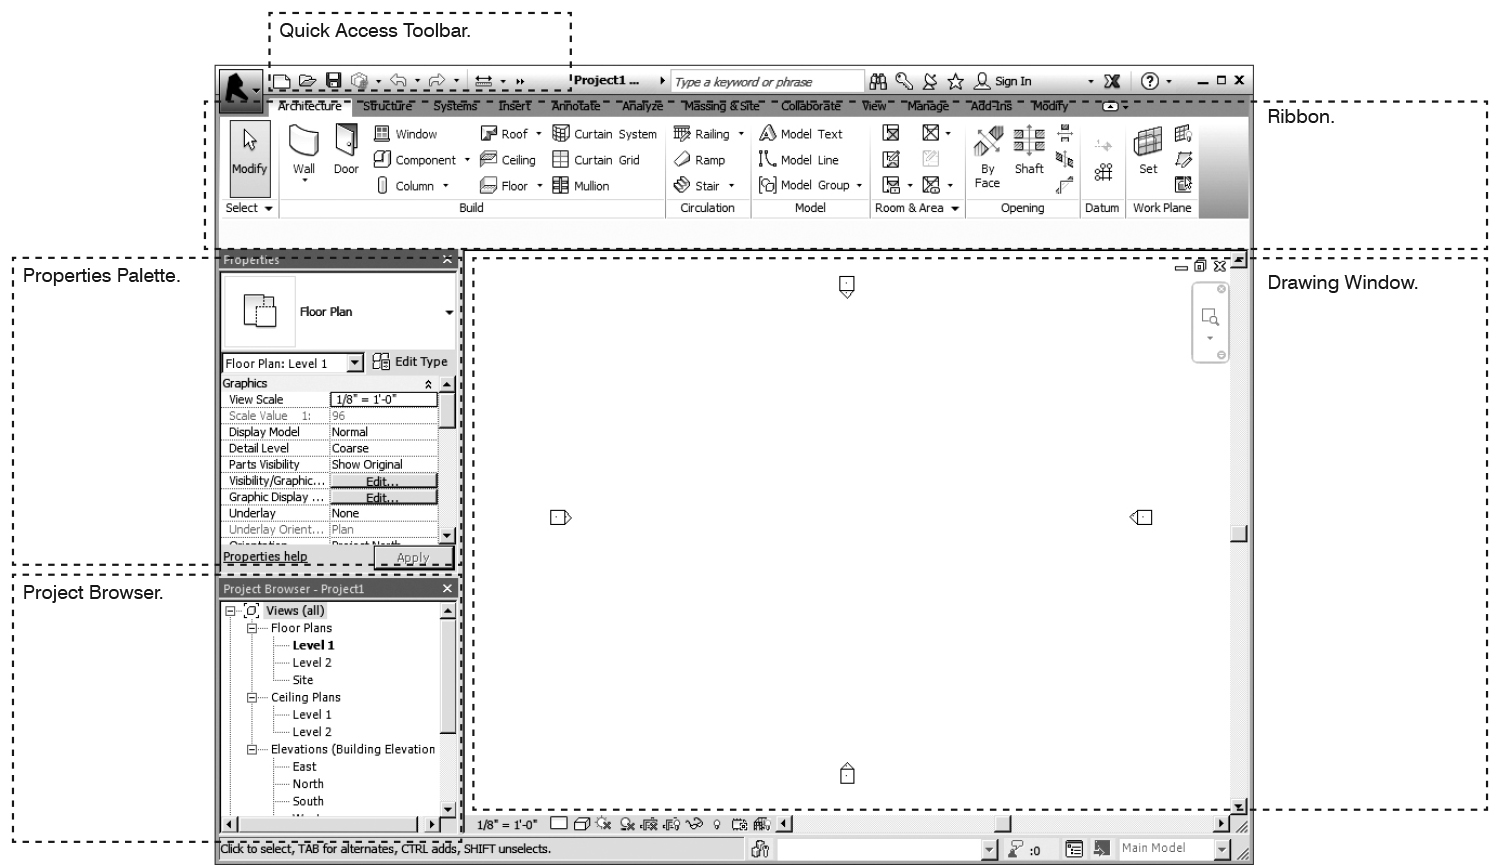
2. From the QUICK ACCESS TOOLBAR, click on the Default 3D view icon (it looks like a house).
3. On the Architecture tab in the RIBBON, find the Work Plane panel (far right side). Click on Show.
4. On the Architecture tab, Build panel, click Wall.
5. With the Wall command active, choose a wall type from the top area of the PROPERTIES PALETTE. (This area of the palette is known as the Type Selector.)
6. While the Wall command is active, notice that the RIBBON has changed to include a new set of tools. On the Modify | Place Wall tab, from the Draw panel, choose the Rectangle drawing tool.
7. Draw a rectangular enclosure by clicking two corner points on the Work Plane.
8. Choose Architecture > Build > Door. Insert one or more doors in the wall. Notice that Revit restricts how doors can be placed (i. e., doors must be “hosted” by walls).
9. Choose Architecture > Build > Window. Insert one or more windows in the wall. Windows must also be “hosted” by walls.
10. In the PROJECT BROWSER, double-click on the East Elevation view. Use this view to add new Levels (choose Architecture > Datum > Level, or Modify > Modify > Copy), or to change the location of existing Levels.
11. Return to the Default 3D view, and click on one wall of the rectangular enclosure. With the wall selected, change the Top Constraint (found in the PROPERTIES PALETTE) from Unconstrained to “Up to Level…”
12. Experiment with switching between views in the PROJECT BROWSER and changing the height of Levels.
