Materials can be assigned to elements in Revit projects in several ways. For example, an entire category of elements, such as Walls, can be assigned a single material in one step. Or, a face of an element, such as the exterior surface of a single Wall, can be assigned a material.
Generally, materials are organized and specified using the Material Browser. The Material Browser can be accessed directly, or it can be accessed during a material-application process.
Applying a Material to a category of elements:
1. Open an existing Revit project.

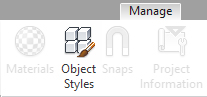
2. On the Manage panel, Settings tab, click the Object Styles tool.
3. In the Object Styles dialog box, highlight a Category of elements for material application (for example, “Walls”).

4. Click the entry in the Material column (for example, “Default Wall”).
5. Click on the ellipsis (“…”) next to the Material entry. This takes you to the Material Browser, where you can specify material settings for the selected category. (See the Material Browser tutorial for further information on materials.)
