
1. In Rhino, use the Curve command to draw an arbitrary curve in 3D space.
2. Start Grasshopper.
3. Insert the Curve parameter.

4. Right-click on the Curve parameter and choose Set one curve. Click on the curve you drew in Rhino.
5. Right-click on the Curve parameter and choose Reparameterize. This forces Grasshopper to measure values along the curve starting with 0 and ending with 1.

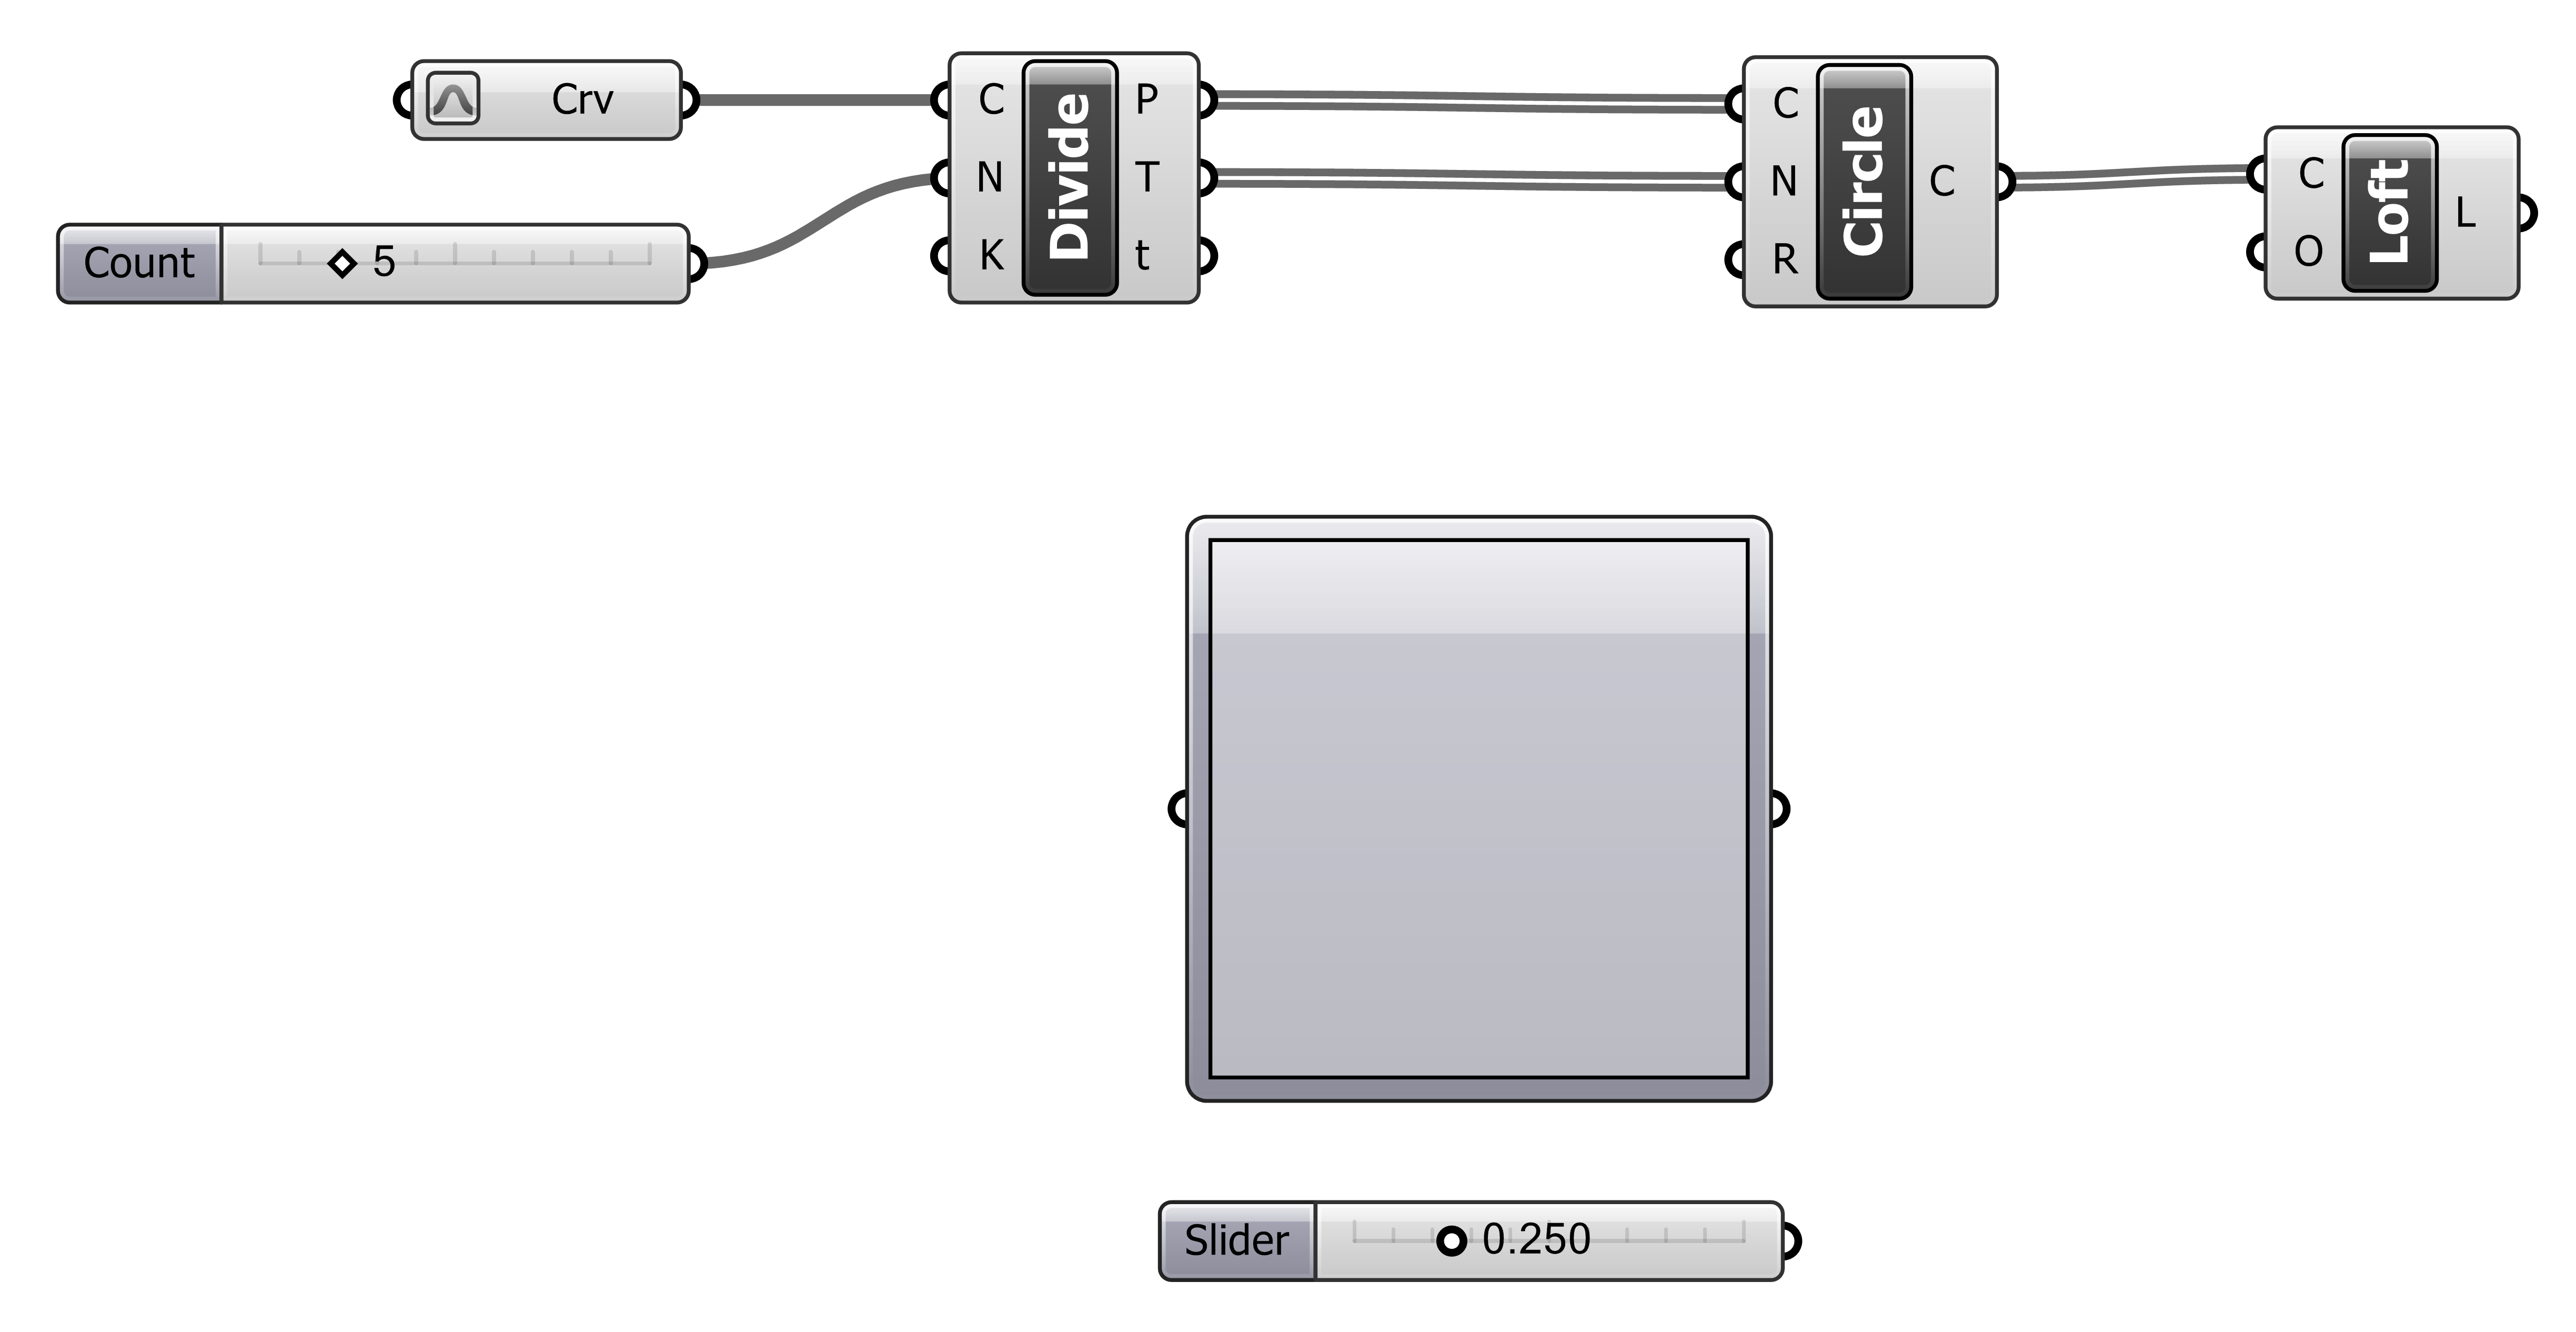
6. Insert the Divide Curve component.

7. Insert a Number Slider.

8. Edit the Slider values: Under Slider accuracy, set Integer Numbers. Under Numeric domain, set 1 as the Min and 20 as the Max.

9. Connect the components: Crv output connects to the C input on the Divide Curve component; Slider output connects to the N input on the Divide Curve component. [The first connection tells the Divide Curve component what curve to divide; the second connection tells the Divide Curve component how many divisions to make.]

10. Insert the Circle CNR (Center-Normal-Radius) component.

11. Connect the components: P output on the Divide Curve component connects to the C input on the Circle CNR component; T output on the Divide Curve component connects to the N input on the Circle CNR component. [The first connection tells the Circle CNR component to draw circles centered at each of the division points; the second connection tells the Circle CNR component to “tilt” the planes on which circles are drawn to align with the Rhino curve.]

12. Insert a Loft component.

13. Connect the components: C output on the Circle CNR component connects to the C input on the Loft component. [This connection tells the Loft component to create a surface using the circles as “ribs.”]

14. Insert the Graph Mapper component and another Number Slider.
15. Right-click on the Graph Mapper component. From Graph types, choose SinC.

16. Edit the Slider values: Under Numeric domain, set 1 as the Min and 50 as the Max.

17. Insert the Multiplication component.

18. Connect the components: t output on the Divide Curve component to the input on the Graph Mapper component; output on the Graph Mapper component to the A input on the Multiplication component; output on the Slider to the B input on the Multiplication component. [These connections produce a list of numbers which is then multiplied by the output of the Number Slider. The list of numbers is determined by the y-coordinates of the graph in the Graph Mapper corresponding to the given x-coordinates (i. e., the inputs to the Graph Mapper).]

19. Connect the components: R output on the Multiplication component to the R input on the Circle CNR component. [This connection tells the Circle CNR component to draw circles at radii corresponding to the output of the Multiplication component.]
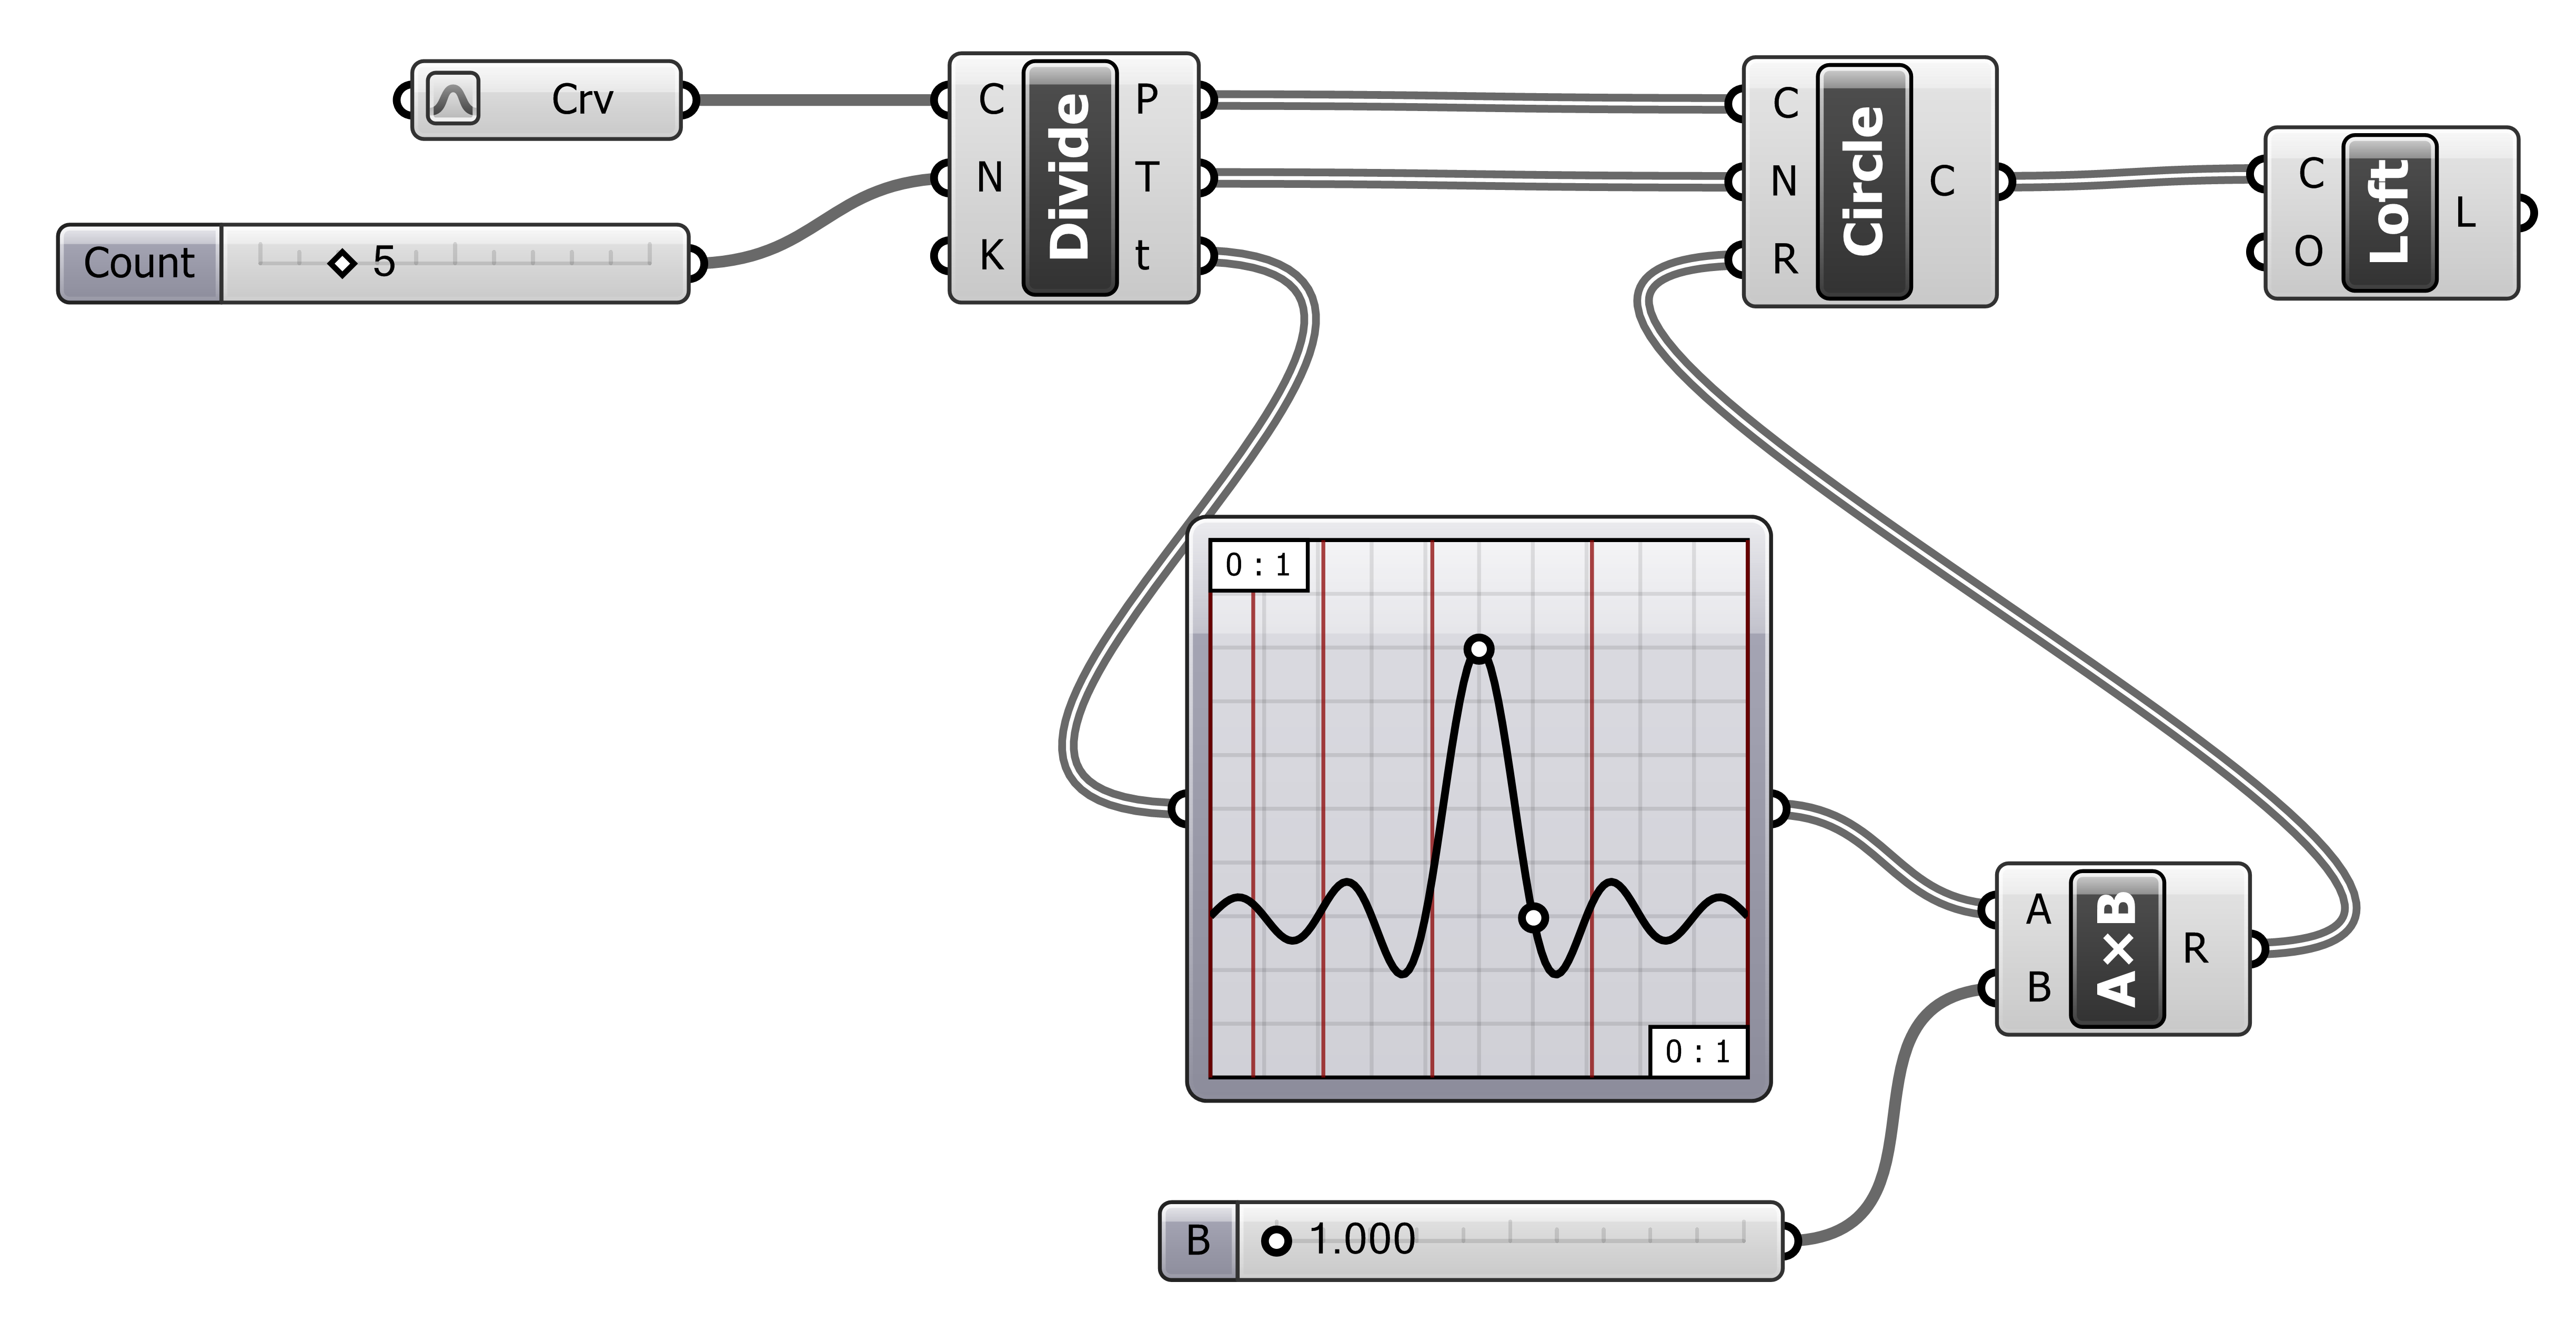
20. The Grasshopper definition is complete. Experiment by (1) selecting different curves from Rhino; (2) changing the number of divisions (first Number Slider); (3) changing the shape of the graph in the Graph Mapper component (move the grips); (4) changing the graph type in the Graph Mapper component; (5) changing the multiplication value (second Number Slider).
