This workflow is concerned with the creation of Revit geometry (building elements), such as floors and walls, based on imported masses. (For an example of importing a mass, see Importing a SketchUp Massing Model to Revit.)
1. Create or load a Mass family into a Revit project.

2. View the mass in an Elevation view.
3. Create Levels corresponding to floor surfaces.

4. Return to the default 3D view and select the mass by clicking on it.

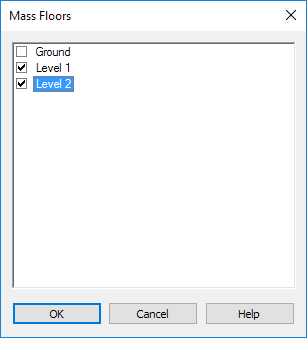
5. On the Modify|Mass tab, Model panel, click the Mass Floors tool.

6. Select the Levels corresponding to the Mass Floors you wish to construct. Click OK.
7. Verify the placement of the Mass Floors in the default 3D view. (Note: You may need to adjust the Visibility/Graphics settings to see the mass and the floors. Type VG and make sure the Mass category is fully visible.)

8. On the Massing & Site tab, Model by Face panel, click the Floor tool.

9. On the Modify|Place Floor by Face tab, Multiple Selection panel, click the Select Multiple tool.

10. Click on a Mass Floor for which you wish to create a building floor. (Note: If the floor is to be offset from the level of its corresponding Mass Floor, set the Offset value on the Options Bar.)
11. In the Properties Palette, choose a Floor Type for the floor you wish to create.

12. On the Modify|Place Floor by Face tab, Multiple Selection panel, click Create Floor.
13. Check the placement of floors in the default 3D view. (Note: You may need to adjust the Visibility/Graphics settings in order to hide the mass elements. Type VG and make sure the Mass category is hidden, i. e., unchecked.)

