AutoCAD is a command-driven software application, meaning that it responds to commands typed after the Command prompt at the bottom of the screen. Commonly used commands (and equivalent keyboard shortcuts) are as follows:
LINE (L): The LINE command draws straight lines between specified points. The command will keep prompting you to enter points until you terminate the command by clicking the esc key (or by clicking Enter without indicating a point).
Hint: Use the [F8] key to restrict lines to orthogonal directions.
Ribbon: Home > Draw > Line
ERASE (E): The ERASE command erases objects. The command will prompt you to select objects.
Ribbon: Home > Modify > Erase
PAN (P): PAN has the same effect as clicking on the scroll bars at the edge of the window, or holding down the center mouse wheel and moving the mouse.
Hint: Every once in a while, AutoCAD will prevent you from panning your view too far in one direction; the screen will “stick”. To get around this, click esc a few times in succession, and then type RE (for Regenerate). This forces AutoCAD to regenerate the drawing display, expanding the area over which you can pan.
Note: To invoke a “legacy” version of the PAN command, type -PAN (hyphen PAN) or -P. This is a useful and more precise variation of the command; it operates analogously to MOVE.
Ribbon: View > Navigate 2D > Pan
ZOOM (Z): ZOOM works like a magnifying glass; use it to enlarge or reduce the apparent size of the drawing. Note that ZOOM does not change the actual size of the drawing – just its appearance. Typing ZOOM at the command prompt, and then choosing the Realtime option, has the same effect as spinning the mouse wheel.
Hint: As with the PAN command, AutoCAD will occasionally prevent you from zooming your view too far in or out. If this happens, click esc a few times in succession, and then type RE (for Regenerate). Ultimately, there are limits to how far you can zoom in or out (try and find these).
Hint: Typing Z, for Zoom, followed by E, for Extents (that is: Z-enter-E-enter), causes AutoCAD to zoom out to the full extents of your drawing. Z-enter-A-enter has a similar (though not identical) effect.
Ribbon: View > Navigate 2D > Zoom
MOVE (M): The MOVE command moves objects, translating them from one point to another. The command prompts you to select objects, and then it prompts you for a base point. The base point can be any point in the drawing, not necessarily on the objects being moved. The command then asks for a second point (a displacement point). The objects are erased from their original location.

Ribbon: Home > Modify > Move
COPY (CO): The COPY command differs from ctrl-C in that it includes a “Paste”-like operation. COPY is fundamentally the same as the MOVE command except that the original objects are not erased from their original location. Also, COPY allows you to make multiple copies at one time: to do this, type M after you’ve completed selecting objects.

Ribbon: Home > Modify > Copy (different than using ctrl-C to copy)
TRIM (TR): Use the TRIM command to “cut” an object with another object. For example, two non-parallel lines can be used to cut each other. The command will prompt you to select “cutting edges” (you can select as many edges as you want). After you’ve selected edges, the command will prompt you to select the objects to trim. Click on the part of the object you want to have disappear.

Hint: When selecting objects, type ALL, or simply press enter at the first prompt to select objects. Then, when selecting objects to trim, every object in the drawing can potentially trim every other object in the drawing.
Hint: Type EDGEMODE at the Command prompt to switch between two different settings (0 or 1): when set to 0, objects must be in contact to trim one another.
Hint: When selecting objects to trim, type F (for Fence). See section 1.4 for more on this.
Hint: When using the TRIM command, hold down the Shift key to change its function to EXTEND.
Ribbon: Home > Modify > Trim
EXTEND (EX): EXTEND is the “reverse” of TRIM. The command prompts you to select “boundary edges” (you can select as many edges as you want). After you’ve selected edges, the command will prompt you to select the objects to extend. Click on the part of the object you want to extend.

Hint: When using the EXTEND command, hold down the Shift key to change its function to TRIM.
Ribbon: Home > Modify > Extend
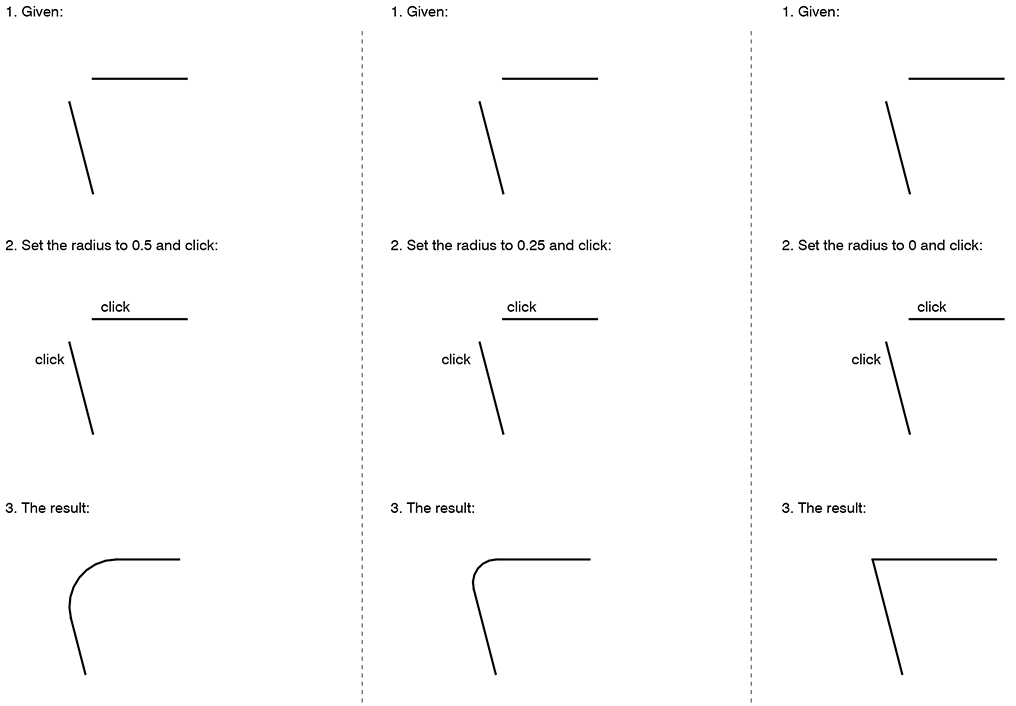
FILLET (F): The FILLET command can be differently understood as a combination of the functions of EXTEND and TRIM, and/or as a means of providing rounded connections between lines. The command always operates on two independent objects. Its operation is constrained by its radius setting. (To change the fillet radius, type FILLET, and then type R for radius.)
Ribbon: Home > Modify > Fillet
CIRCLE (C): CIRCLE draws circles by one of several methods, e. g. the default center-radius method.

Hint: Sometimes, AutoCAD will temporarily display circles as polygons (octagons are common substitutes). This is a time-saving device built into the program. To display the circles correctly, type RE (for Regenerate).
Ribbon: Home > Draw > Circle
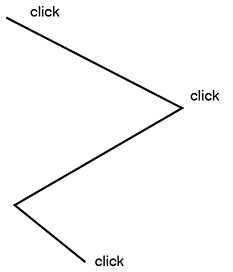
ARC (A): ARC draws arcs by one of several methods. When using the center-start-end method, note that arcs are drawn counterclockwise.
Hint: Sometimes, AutoCAD will display arcs as line segments. To display the arcs correctly, type RE (for Regenerate).
Ribbon: Home > Draw > Arc
OFFSET (O): OFFSET is used to create parallel lines and concentric curves. It operates on one object at a time. The general procedure is: type OFFSET; click on the object; specify a distance; finally, click off to one side of the object (e. g. left side or right side, top or bottom).

Ribbon: Home > Modify > Offset
TEXT (DT) and MTEXT (T). The TEXT and MTEXT commands are used to add text to drawings. TEXT adds text one line at a time; MTEXT operates more like a word processor, with greater control over editing. Both commands are subject to the settings in the STYLE command: use STYLE to set basic attributes for fonts.
Important: When you use the STYLE command to define a New Style, it’s usually a good idea to define the style to have a text height of 0. This ensures that AutoCAD will prompt you to enter a text height every time you try to add TEXT or MTEXT.
Ribbon (TEXT): Annotate > Single Line Text
Ribbon (MTEXT): Annotate > Multiline Text
MIRROR (MI): MIRROR is used to create a “reflection” of existing objects around a line. Define this line with any two points in the drawing.
Ribbon: Home > Modify > Mirror
ROTATE (RO): ROTATE will rotate any selection set of objects around a fixed point. Note that AutoCAD measures degrees counterclockwise, with “0 degrees” corresponding to a “3 o’clock” position.
Ribbon: Home > Modify > Rotate
SCALE (SC): Use SCALE to enlarge or reduce any selection set of objects by a specified scale factor with reference to a fixed point.
Ribbon: Home > Modify > Scale
BLOCK (B): Creates a “block” (collection of objects with an insertion point).
Ribbon: Home > Block > Create
EXPLODE (X): Explodes blocks into their constituent parts.
Ribbon: Home > Modify > Explode
3D-ORBIT (3DO): Rotates the view in 3D space.
Ribbon: View > Navigate > Orbit
